
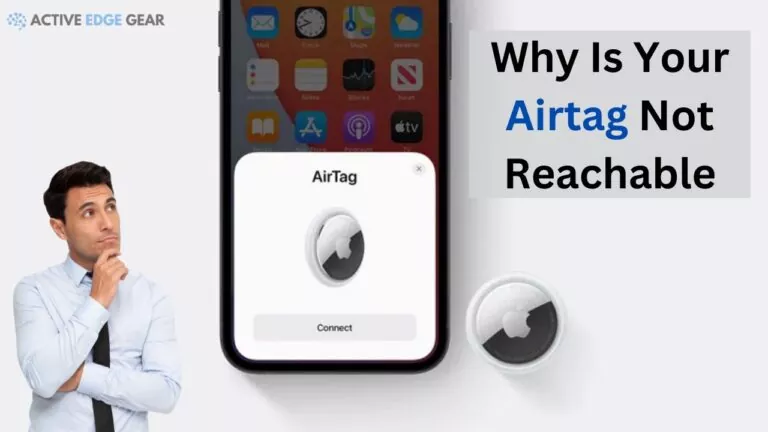
Are you struggling to connect your AirTag because it constantly appears as ‘not reachable‘? This is a common issue that frustrates many users trying to keep track of their valuable items.
The “Airtag is not reachable” error may occur due to various factors, including issues with your device’s Bluetooth settings, the Airtag being out of proximity range, potential interference from other devices, or a low battery in the Airtag.
From ensuring proper Bluetooth connectivity to checking for signal blockages and updating firmware, troubleshooting steps like restarting your iPhone or hard resetting the AirTag can help resolve the problem.
In this post, I will unravel the reasons behind this concern and provide practical solutions on how to rectify it swiftly.
Key Takeaways
- Bluetooth connectivity issues and being out of range are common causes of AirTag not being reachable.
- Signal blockage and radio interference can also contribute to the issue.
- Solutions include restarting the iPhone, ensuring the Find My app is enabled and within range, resetting network settings, updating firmware, and checking Bluetooth settings.
- Additional troubleshooting steps include checking for physical damage to the AirTag, monitoring battery levels, putting it into Lost Mode, and addressing any visible signs of wear or tear.
Common Causes of Airtag Not Reachable Issue
Connectivity issues with Bluetooth, such as pairing problems or weak signal strength, can contribute to the AirTag not being reachable by the user’s device.

Connectivity issues with Bluetooth
Bluetooth connectivity issues often play a significant role in your AirTag not being reachable. The synchronized connection between your iPhone and the AirTag is facilitated through Bluetooth, making it an essential element for smooth functioning.
Any disruption in this synchronization can result in your device displaying the “AirTag Not Reachable” error message, especially if there’s an issue on the paired iPhone or iPad‘s part. It’s crucial to ensure that Bluetooth on your device is turned on and properly working.
If you notice any persistent problem with your Bluetooth function, consider taking steps such as toggling the Bluetooth off before turning it back on or even restarting your device entirely.
These simple troubleshooting steps effectively rectify minor glitches impeding the communication link between both devices.
AirTag being out of range
If you’re experiencing the “AirTag not reachable” issue, one common cause is that your AirTag may be out of range from your iPhone or iPad.
The range of an AirTag assumes that there are no obstacles between you and the tag that could affect the signal.
So if you leave your AirTag behind or venture too far away from it, you might encounter this error message.
To resolve this problem, make sure to stay within a reasonable distance from your AirTag. If you find yourself too far away, simply move closer to the tag and try again.
It’s important to note that the range can vary depending on factors like interference or obstructions in the environment.

AirTag signal being blocked
The AirTag signal being blocked is another common cause for the “AirTag not reachable” issue. There are situations where the signal from the AirTag can be obstructed or interfered with, preventing proper communication with your iPhone or iPad.
This can happen when there are physical barriers, such as walls or other objects, between you and your AirTag. Additionally, certain materials like metal or dense surfaces can attenuate the Bluetooth signal, leading to weaker connectivity.
It’s important to keep these factors in mind and ensure that you’re within reasonable proximity to your AirTag for optimal performance.
If you suspect the signal blockage is causing the issue, try repositioning yourself closer to the AirTag and see if that resolves the problem.
Radio interference
One of the common causes for your AirTag not being reachable is radio interference. Radio signals from various sources, such as other electronic devices or nearby Wi-Fi networks, can interfere with the communication between your AirTag and your iPhone or iPad.
This interference can weaken or block the signal, causing connectivity issues. To address this problem, it’s important to keep your devices away from potential sources of interference and ensure there are no physical obstructions obstructing the signal.
By minimizing radio interference in your vicinity, you can improve the reliability of your AirTag’s connection and prevent it from becoming unreachable.

Solutions to Fix Airtag Not Reachable Issue
To fix the “AirTag not reachable” issue, you can try restarting your iPhone, ensuring the Find My app is enabled and within range, resetting network settings, updating AirTag firmware, and checking Bluetooth settings.
Read on for more troubleshooting steps! Keep reading to learn how to troubleshoot and resolve common Airtag connectivity issues.
Restarting the iPhone
To fix the issue of an AirTag not being reachable, one of the first troubleshooting steps you can try is restarting your iPhone.
Simply turning off your device and then turning it back on can often resolve connectivity issues between the AirTag and your iPhone.
This simple action refreshes the system, helping to eliminate any potential glitches or temporary software conflicts that may be causing the problem.
By restarting your iPhone, you give it a fresh start and increase the chances of establishing a successful connection with your AirTag.
To fix the “AirTag not reachable” error on your iPhone, one of the first troubleshooting steps you can take is to restart your device. Here’s how you can do it:
- Press and hold the power button (located either on the side or top of your iPhone) until you see the slider appear on the screen.
- Slide the power icon from left to right to turn off your iPhone.
- Wait for a few seconds, then press and hold the power button again until you see the Apple logo appear on the screen.
- Release the power button and let your iPhone boot up.
Remember that restarting your iPhone should be done as part of a series of troubleshooting steps to address the “AirTag not reachable” error message.
If this alone doesn’t solve the issue, move on to other solutions mentioned in this blog post.

Ensuring the Find My app is enabled and within range
To ensure that your AirTag is reachable, it’s crucial to make sure that the Find My app on your iPhone or iPad is not only enabled but also within range.
The Find My app plays a vital role in connecting and locating your AirTag, so it’s essential to double-check its settings.
By enabling the Find My app and ensuring it remains within range of your AirTag, you can enhance the chances of successfully connecting and communicating with your device.
This way, you’ll be able to track and locate your belongings with ease.
Just remember to keep an eye on the connectivity between the Find My app and your AirTag for seamless functionality.
Restarting the Find My app
To resolve the “AirTag not reachable” issue, one of the troubleshooting steps you can try is restarting the Find My app. This simple action can help refresh the app’s connection and potentially fix any temporary glitches or bugs that may be causing the problem.
By closing and reopening the Find My app on your iPhone or iPad, you give it a chance to reestablish communication with your AirTag, improving its chances of being detected and accessible again.
It’s a quick and straightforward solution that Airtag users should definitely consider when dealing with connectivity issues.
Resetting network settings
To fix the AirTag not reachable issue, you can try resetting your network settings. This can help resolve any connectivity issues that may be causing the problem.
By resetting your network settings, you are essentially starting fresh and allowing your device to establish a new connection with the AirTag.
To do this, go to your iPhone or iPad’s Settings, tap on General, then scroll down and select Reset. From there, choose Reset Network Settings and confirm your selection.
Keep in mind that by doing this, you will need to reconnect to Wi-Fi networks and re-enter any passwords previously saved on your device.
However, it could potentially solve the AirTag not reachable problem and allow you to regain communication with your precious belongings.

Hard resetting the AirTag
To resolve connectivity issues with your AirTag, one potential solution is to perform a hard reset. This can help refresh the device and restore its functionality. To do this, simply remove the battery from the AirTag and then reinsert it after a few seconds.
- Press and hold the button on the AirTag for about 15 seconds.
- Release the button when you see the LED light flash white.
This will force the AirTag to reboot and hopefully address any underlying issues causing it to be not reachable.
It’s worth noting that a hard reset should only be done as a last resort if other troubleshooting steps have been unsuccessful in resolving the problem.
Updating AirTag firmware
To ensure optimal performance and enhanced functionality, it is crucial to keep your AirTag’s firmware up to date.
Firmware updates often include bug fixes, stability improvements, and new features that can address any connectivity issues you may be experiencing.
By regularly updating your AirTag’s firmware, you can mitigate potential problems and ensure a seamless user experience.
Simply navigate to the Find My app on your iPhone or iPad, locate the AirTag in question, and check for available firmware updates.
It’s an effortless process that can make a significant difference in resolving any connectivity issues you may encounter with your AirTag.
Checking Bluetooth settings
To troubleshoot the “AirTag not reachable” issue, it’s essential to check your Bluetooth settings. Ensure that Bluetooth is enabled on your device and that there are no other devices connected to it that may be causing interference.
You can do this by going to the Settings app on your iPhone or iPad and navigating to the Bluetooth section. If Bluetooth is off, simply toggle it on.
Additionally, you can try disconnecting any other devices paired with your phone temporarily to see if that resolves the problem.
By checking and adjusting your Bluetooth settings, you can help ensure a smooth connection between your AirTag and device.

Additional Troubleshooting Steps
Check for any physical damage to the AirTag, such as scratches or dents, as this could affect its functionality.
Checking the battery level of the AirTag
To ensure that your AirTag is functioning properly, it’s important to regularly check its battery level. A low battery can cause connectivity issues and prevent your AirTag from being reachable by your iPhone or iPad.
By checking the battery level, you can address any potential power-related problems.
Here are some steps you can take to check the battery status of your AirTag:
- Open the Find My app on your iPhone.
- Tap on the Items tab at the bottom of the screen.
- Look for your AirTag in the list and tap on it.
- The battery status will be displayed under the name of your AirTag.
- Open Find My app > Tap on Items tab
- Look for your AirTag in list > Tap on it
- Battery status displayed under name of AirTag
- Replace battery if level is low
- Use CR2032 coin cell battery
Keeping an eye on the battery level of your AirTag ensures that it has enough power for effective communication with your device.
By promptly replacing a depleted battery, you can eliminate one possible cause of why your AirTag may not be reachable when needed.
Putting the AirTag into Lost Mode
To enhance the chances of finding a misplaced or lost AirTag, users can put it into Lost Mode. This feature enables the AirTag to emit a sound, which helps locate it more easily.
Additionally, if someone else with an iPhone comes across the lost AirTag, they can tap their device on it to view a message with contact information for returning it.
By activating Lost Mode, Airtag users increase their chances of recovering their valuable items and reestablishing connectivity with the tag.

Checking for any physical damage to the AirTag
To ensure the optimal performance of your AirTag, it’s crucial to check for any physical damage. Examine the outer casing of the AirTag for any cracks or visible signs of wear and tear.
Additionally, inspect the battery compartment to ensure there is no corrosion or damage that may hinder proper connectivity.
Physical damage can interfere with the signal strength and overall functionality of your AirTag, making it difficult for it to be detected by your iPhone or iPad.
By routinely checking for any physical damage, you can address potential issues promptly and maintain a seamless connection between your device and AirTag.
FAQs
1. What are the common causes of Airtag not being reachable?
There can be several reasons why your Airtag is not reachable, including low battery level, distance from your device, interference from other electronic devices, or a software issue with the Airtag or your device.
2. How can I check the battery level of my Airtag?
To check the battery level of your Airtag, open the Find My app on your iPhone and go to the Items tab. Locate your Airtag and tap on it to see its current battery percentage.
3. What should I do if my Airtag is not connecting to my device?
If your Airtag is not connecting to your device, make sure that Bluetooth is turned on and that you are within range of both devices. If the issue persists, try restarting both devices and ensure that they have the latest software updates installed.
4. How do I fix a software issue with my Airtag?
If you suspect a software issue with your Airtag, try resetting it by removing and reinserting its battery. You can also unpair and then pair it again with your device using the Find My app settings. If none of these steps resolve the problem, contact Apple Support for further assistance.