
Are you tired of being unable to track your important items because your Apple AirTag’s battery has died? Don’t worry, replacing the battery in your AirTag is a straightforward process that you can do yourself without needing to seek professional help.
Here’re the steps to do it right:
- First, locate the stainless steel back of the device.
- Then, twist it counterclockwise to unlock and remove it from the AirTag.
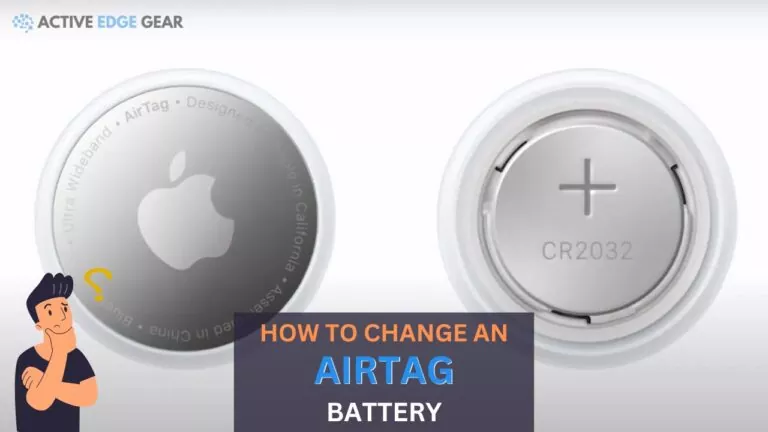
- Next, take out the old battery from the battery compartment and get a new CR2032 coin cell battery.
- Once you have the new CR2032 lithium coin cell battery, insert it into the battery compartment with the positive (+) side facing up.
- Now, it’s time to reattach the stainless steel back to the AirTag.
- Make sure to align it properly and twist it clockwise to lock it in place.
Finally, you’re all set! Once the battery is replaced, your AirTag is ready to be used again.
Notification for Replacement
When your Apple Air Tag battery needs replacing, you’ll receive a notification. Did you know that the battery used is the inexpensive and widely available CR2032 battery?
Specifications of the CR2032 battery include a voltage of 3V and a capacity of approximately 225mAh. It has a shelf life of around 1-2 years, ensuring long-lasting performance.
This is longer than most other trackers on the market, giving you peace of mind that your Air Tag will last for a while before you need to replace the battery.
To give you a clear understanding, here is a table presenting the battery type and specifications of an Airtag:
| Battery Type | Voltage | Capacity | Shelf Life |
|---|---|---|---|
| CR2032 | 3V | 225mAh | 1-2 years |
If you don’t have a CR2032 battery on hand, there are alternatives available, such as the Energizer 2032 or Duracell DL2032.
However, it’s important to note that using a different battery may affect the performance of your Air Tag and void any warranty.
We advice to stick with the recommended CR2032 battery to ensure optimal performance and longevity for your device.

Considering these aspects, here are some suggestions to maximize the battery life of your Airtag:
- Opt for quality batteries: Choose reputable brands to ensure reliable performance. Low-quality batteries may not provide the expected lifespan or may even leak, damaging your device.
- Keep spare batteries handy: It’s a good practice to have spare CR2032 batteries available, especially when you rely heavily on your Airtag. This way, you can quickly replace the battery without any interruptions in usage.
- Store Airtag in a cool and dry place: Extreme temperatures and humidity can affect the battery life of Airtag. Storing it in a cool and dry location helps maintain optimal performance.
By following these suggestions, you can ensure prolonged battery life and optimal performance for your Airtag. Get ready to play detective with your Airtag’s battery because this tiny powerhouse will keep you on your toes.
Also read: Does Airtag Die?
Battery Type and Brand
To replace the battery in your Apple AirTag, you’ll need to use a CR2032 battery with the recommended brand being Energizer Ultimate.
This brand has been proven to be reliable and long-lasting, ensuring that your AirTag will continue to function optimally. The positive side of the battery should be placed on top before putting the cover back on and turning it until it clicks.
When it comes to choosing the right battery for your AirTag, it’s important to consider the longevity and reliability of different brands.
The table below provides a comparison of different CR2032 batteries, highlighting the advantages of using Energizer Ultimate.
By choosing this brand, you can ensure that your AirTag will continue to work efficiently and effectively for a long time.
| Brand | Longevity | Reliability | Cost |
|---|---|---|---|
| Energizer Ultimate | High | High | Moderate |
| Duracell | Moderate | High | High |
| Panasonic | Moderate | Moderate | Low |
| Sony | Low | Low | Low |
Step-by-step guide to changing the airtag battery
A professional guide to changing the battery of an Airtag is provided below. Follow the step-by-step instructions carefully to ensure a successful battery replacement.
- Remove the Airtag cover: Gently pry open the cover on the back of the Airtag using a small, flat tool. Be careful not to exert too much force to avoid damaging the device.
- Take out the old battery: Once the cover is removed, you will see the battery compartment. Use your fingers or a non-metallic tool to carefully lift and remove the old battery from the compartment.
- Insert the new battery: Take the new battery and align the positive (+) and negative (-) sides correctly with the markings inside the battery compartment. Carefully place the battery into the compartment, ensuring it is securely seated.
- Replace the Airtag cover: Gently press the cover back onto the Airtag until it clicks into place. Make sure it is firmly closed to prevent any water or dust from entering the device.
It is important to note that the Airtag battery type may vary, so make sure to use the appropriate battery recommended by the manufacturer.
When changing the Airtag battery, it is crucial to handle the device and battery with care to avoid any damage. Follow these instructions precisely, and you will be able to successfully change the battery of your Airtag.

In addition, it is recommended to regularly check the battery status of your Airtag to ensure it is functioning optimally. This can be done through the Find My app on your compatible Apple device.
True story: A friend of mine recently had to change the battery of their Airtag. Following the step-by-step guide provided by Apple, they were able to replace the battery easily and continue using the Airtag without any issues. It was a simple and straightforward process that saved them from having to purchase a new device.
Unlocking the Airtag case is like cracking a safe, but with less adrenaline and way more frustration.
Opening the airtag case
Ever thought about how to open an Airtag case? Here’s a step-by-step guide to help you find out its secrets.
- Find the groove: Check your Airtag carefully and locate the small groove on its edge. That’s where you’ll start opening the case.
- Use a thin tool: Put a thin tool, like a flathead screwdriver or SIM card ejector tool, into the groove. Then, press gently to pry open the case.
- Separate gradually: Move around the edges of the case with your tool slowly. Be careful not to push too hard, as it could damage the Airtag or its parts.
- Take off the top cover: Keep going until you can remove the top cover completely. Put it aside for now and move on to the battery.
- Done! You’ve opened the Airtag case. Now you can replace the battery.
Remember! Always use official Airtag batteries for replacements. Get reliable batteries from authorized sources.
Now you know how to open the Airtag case, you can get rid of those low-battery alerts! But be aware: According to MacRumors, opening an Airtag may void its warranty in some cases. So handle your device with care!
Removing the old battery
First, locate the battery compartment at the back of your Airtag. Take a small, flat-head screwdriver or any other tool with a flat tip that fits into the groove near the edge.
Gently insert the screwdriver and apply pressure to lift and separate the cover from the rest of the Airtag. Slowly remove the cover, without using too much force, that could damage internal components.
Once you have removed the old battery, handle it with care and dispose of it according to local regulations. Inspect inside your Airtag for dirt or debris.

When inserting the new battery, clean any dirt or debris, use the correct type, align the positive and negative terminals correctly with their markings, and firmly press down to ensure proper contact and stability.
Prioritize safety and proper handling of both the old and new batteries. Now your airtag can have a new battery without complications or issues.
Inserting the new battery
Changing the battery in your Airtag is a cinch! Here’s how:
- Remove the old battery: Locate the small indentation on the back of the Airtag. Press down and twist counterclockwise to unlock the battery compartment, then carefully remove the old battery.
- Insert the new battery: Align the new battery with the +/- markings inside the compartment. Place it securely and snugly into the housing.
- Lock the battery compartment: Twist the cap clockwise until you hear a click. Double-check to make sure it’s secure before using your Airtag again.
Handle with care and use only compatible batteries as specified by Apple to avoid damage or malfunction. Airtags are user-friendly, with an easily accessible battery compartment for quick replacements.
They were introduced in April 2021, with Bluetooth connectivity and long-lasting batteries to help locate lost items. Changing batteries easily enhances their functionality and usability.
Closing the airtag case
For a closed airtag case, you just need six simple steps:
- Push down on top until you hear a click.
- Hold the sides and slide the case up.
- Slide the battery cover off.
- Take out the old battery and dispose of properly.
- Put in a new CR2032 coin cell battery with the positive side up.
- Slide the battery cover back and align it with the bottom part.
Clean any dirt or debris before closing.
Testing the airtag after battery replacement
Replaced the battery of your Airtag? Test its functionality! This is crucial to make sure it works as intended and provides reliable tracking. Here’s a 6-step guide:
- Power On: Insert the new battery and secure the compartment.
- Activate Pairing Mode: Press and hold the button until you hear a sound.
- Connect Via Bluetooth: Open Find My app and go to Items tab.
- Locate Your Airtag: Look for it and check if the green dot shows it’s online.
- Test Range: Move around with your Airtag and check the range.
- Check Sound Alert: Use the Find My app to play a sound.
Also, check for software updates in the app settings. Testing ensures your Airtag functions properly and gives peace of mind.
Apple recommends doing this regularly for optimal performance. Need help? Just hit the ‘refresh’ button!
Troubleshooting common issues during battery replacement
Changing an Airtag battery can cause issues. Here are some tips to help you fix them:
- Insert the battery correctly:
- Use a coin or screwdriver to open the battery cover.
- Check the positive (+) sign on the battery matches the same symbol on the Airtag.
- Push the battery in until it snaps into place.
- Clean the contacts:
- Wipe the metal contacts on the Airtag and battery with a soft cloth.
- Remove any dirt or residue that may be hindering electrical connection.
- Reinsert the battery and check if it works.
- Restart your Airtag:
- Press and hold the button on the back of your Airtag to make it blink.
- Release the button and wait for your Airtag to restart.
- Contact customer support:
- If all steps don’t work, reach out to customer service for more help.
Remember to also refer to the official user manual provided by Apple when replacing an Airtag’s battery.

Frequently Asked Questions
Q: How often do I need to change the battery on my Airtag?
A: The battery on an Airtag typically lasts for about a year, so you should plan to replace it annually.
Q: What type of battery do I need to use in my Airtag?
A: The Airtag uses a CR2032 lithium coin cell battery, which you can find at most electronics or hardware stores.
Q: How do I open the Airtag to replace the battery?
A: To open the Airtag, press down on the stainless steel back cover and turn it to the left. The cover should release, allowing you to access the battery compartment.
Q: What do I do with the old battery once I’ve removed it from the Airtag?
A: It’s important to dispose of lithium coin cell batteries properly, as they can be hazardous to the environment. Check with your local municipal authority or recycling center for guidance on how to dispose of the battery safely.
Q: Do I need any special tools to change the Airtag battery?
A: No, you don’t need any special tools. You can easily replace the battery using just your hands.
Q: How do I know when it’s time to replace the battery on my Airtag?
A: If your Airtag stops responding or appears to be malfunctioning, it’s likely time to replace the battery. Additionally, if you notice the battery level icon in the Find My app is low, that may also be an indication that it’s time to replace the battery.